GA4
-
Go to https://analytics.google.com Before Beginning, let's make sure that we don't already have a GA4 Property created for this account.
-
Please click on the properties drop down
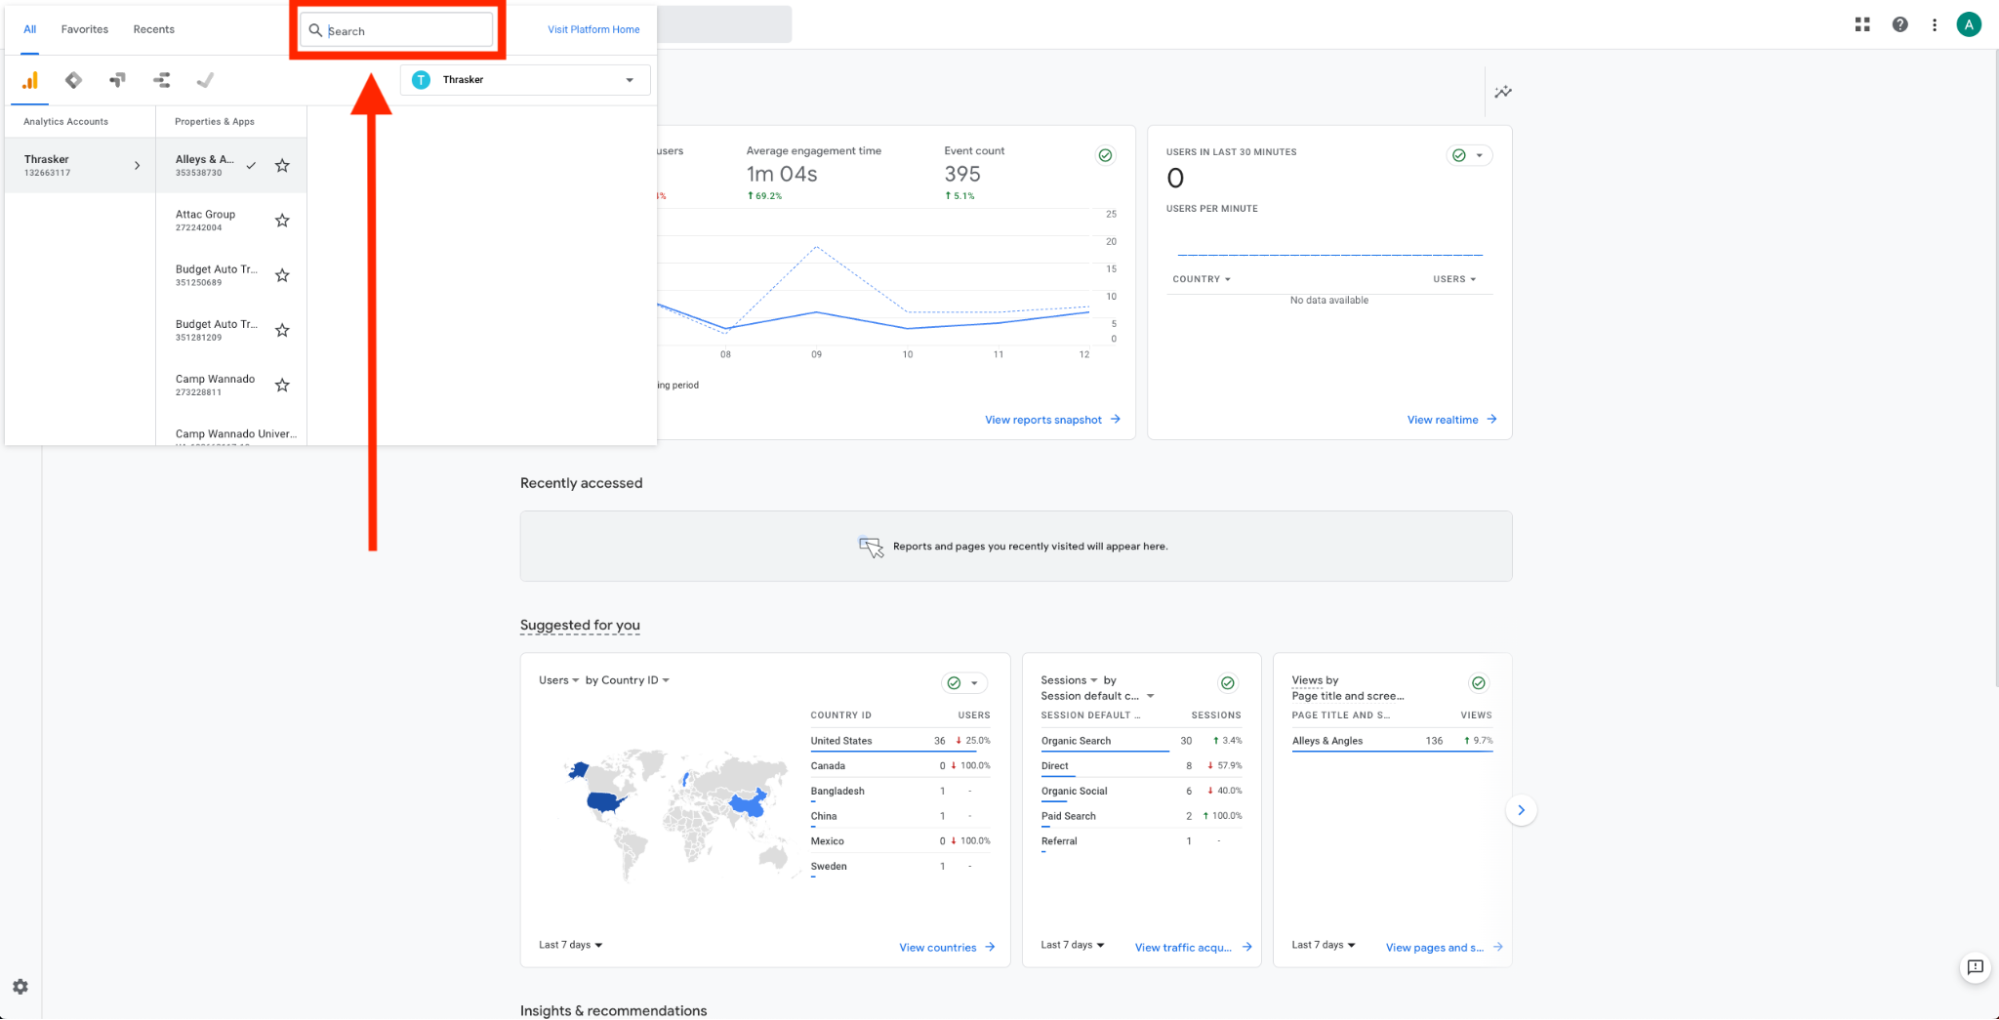
-
Once clicked you will see all the properties and apps underneath our analytics account. Please go to the search bar and type the clients businessn name, to the first make sure that htere isn't a property already created.
-
After searching for the clients business name and trying a couple of combinations, if you do not see anything appearing, you could make the assumption that the property does not exist.
-
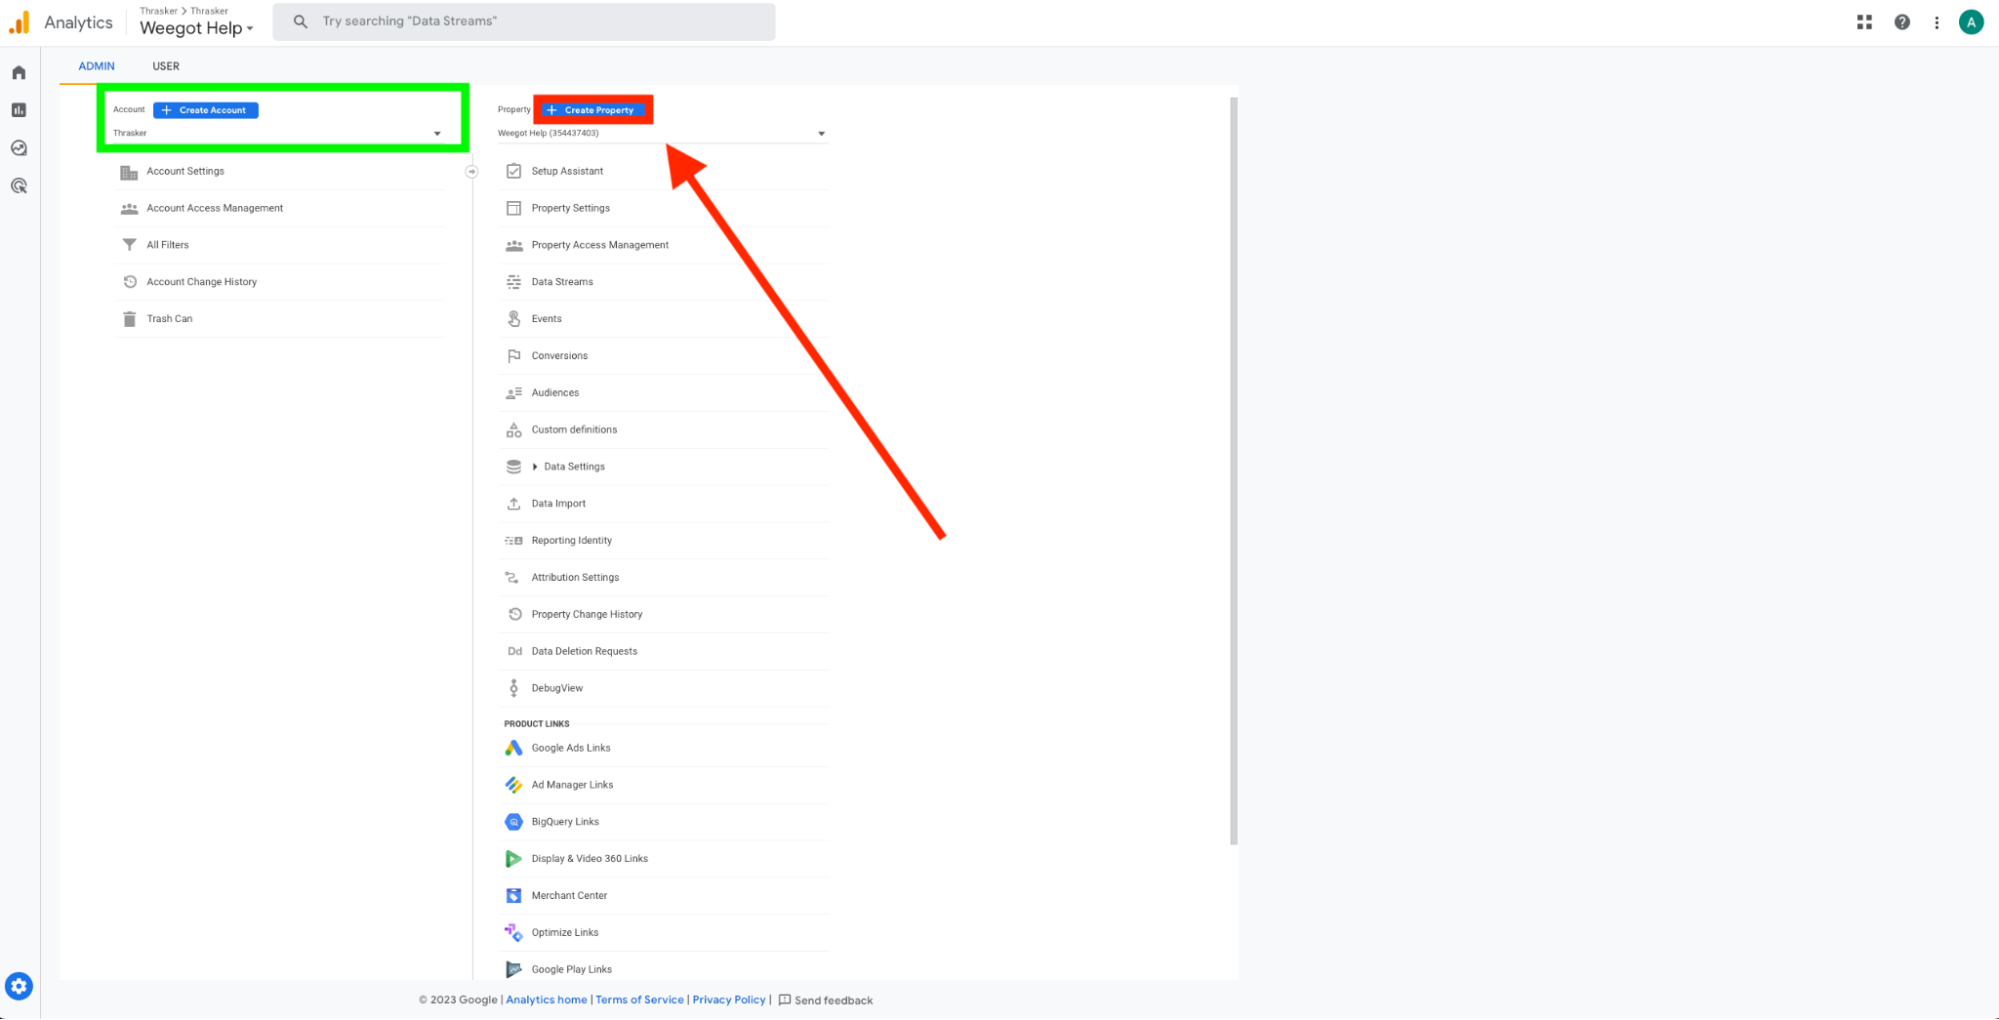
After you have checked to make sure that a property does not exist, now it's time to create a new one. Starting back from the home page. Click on the settings button on the bottom left.
-
Once you click on the butotn you will see our Thrasker account on the left hand side, and then some random proeprly within our account on the right hand side. As long as you see our account on the left hand side (noted inside of the green rectangle) then you are good to proced with creating the property. This means that it will create the property within our Thrasker account. So go ahead and click on the "Create Property" button. (Noted Inside of the Red Rectangle)
-
For this tutorial I will be creating and implementing the "Vision Strategy" clients GA4 Tag. Go ahead and put in the property nameof the client, and then make sure the reporting time zone is New York Time. Then Hit Next.
-
It will then want some business information, you can completely skip this step because we don't need to fill out this information. So as soon as you see this page, you can hit create.
-
Upon creation / completion of the previous step, it will automatically throw you into the Data Streams section to have you complete the setup to start collecting data. (If you somehow)
-
Now it's time to enter in the information for the web stream. Make sure that HTTPs is filled in for the first box. The second box is the base URL so not "www" or trailing "/" and the stream name doesn't necesarrily matter but for naming convention lets always use
Company_Name+ Website so for Vision Strategy its "Vision Strategy Website" -
After creating you will see the Web Stream Details Page, and after a few second you will see a pop up for the Installation Instructions.
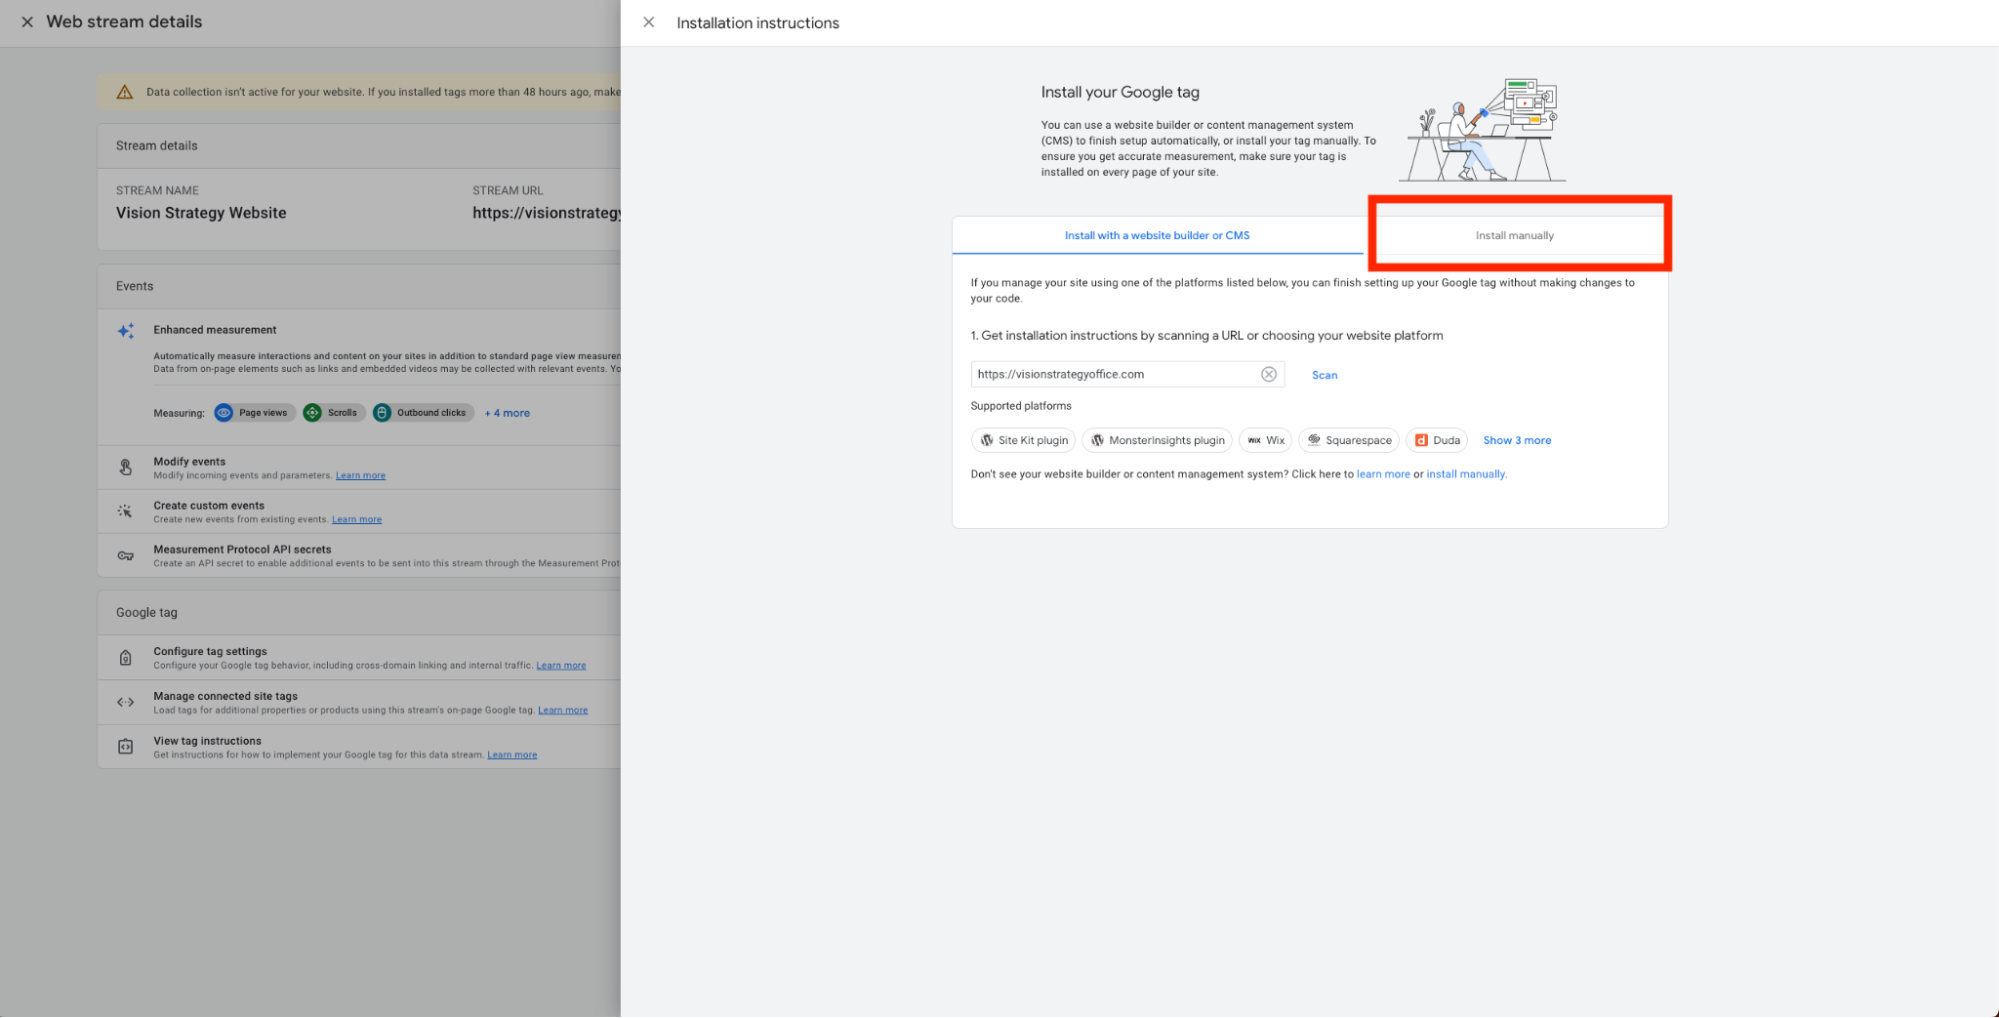
-
After hitting Install Manually you will see the code that you will need to copy by click on the button noted below. After copying the code, let's head over to netlify to install.
-
Let's go ahead