Astro Setup
Prerequisites
- Node.js - v18.14.1 or higher.
- Text editor - VS-Code (recommend)
- Extension - Astro
Astro Installation:
Create Project:
npm create astro@latest my-project
Install Tailwind CSS with Astro:
Install Tailwind CSS
npx astro add tailwind
Start Your Build Process with Tailwind
npm run dev
Prefered Extensions:
-
Astro
-
Astro snippets
-
Tailwind CSS IntelliSense
-
Live server
-
Auto Rename Tag
-
IntelliSense for CSS class names in HTML
-
Prettier - Code formatter
-
Color Highlight
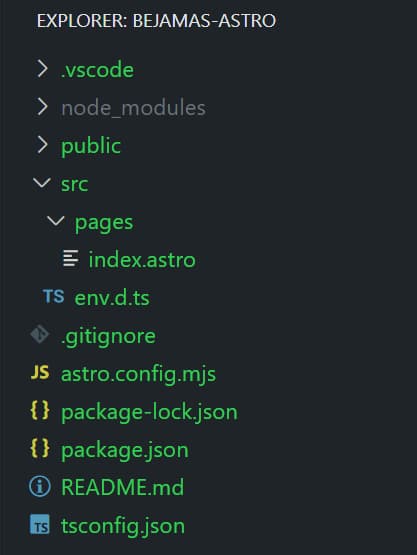
Astro Project Structure
Astro’s file structure is fairly straightforward.
src: Your source code (components, pages, styles, etc.)
public: Your assets (fonts, icons, etc.)
In the src/pages directory, Astro creates an index.astro file which you can think of as your index.html.
It’s important to note that, the src/content/ is a reserved directory in Astro. Astro v2.0 introduced the Collections API for organizing your Markdown and MDX files into content collections. This API reserves src/content/ as a special folder.
Astro Pages
Alright, let's talk about pages in Astro. Astro pages handle routing, data loading, and overall page layout for every page on your website. They are files with different extensions that live in the src/pages/ subdirectory.
In Astro, we have different types of pages, including .astro, .md, .mdx, .html and even .js/.ts. Each of these file types serves a different purpose and can be used in different ways to create your pages.
Astro uses a routing strategy called file-based routing, which means that each file in your src/pages/ directory becomes an endpoint on your site based on its file path. This allows for flexibility and easy organization of your pages.
In this tutorial, we will mostly create pages with .astro and .md files. Note that if you use .html pages some key Astro features are not supported in HTML components.
Now let’s create the second page to see how it works. All you need to do is create a file next to index.astro in the src/pages directory.
I’m going to name it about.astro and write a very simple markup inside of it:
<html lang="en">
  <head>
    <meta charset="utf-8" />
    <link rel="icon" type="image/svg+xml" href="/favicon.svg" />
    <meta name="viewport" content="width=device-width" />
    <title>About</title>
  </head>
  <body>
    <h1>About</h1>
    <p>Thrasker development agency.</p>
  </body>
</html>
Now you can visit localhost:3000/about to see this page in your browser. As you can see the /about route works out of the box here as soon as you add the file to the pages folder.
You can update the content or even add your own internal style and Astro will take care of the live preview for you. So no need to install any live-reload NPM packages or those sorts of things.
To be able to navigate easily between pages I’m going to add navigation to my index.astro and about.astro files:
<body>
  <nav>
    <a href="/">Home</a>
    <a href="/about">About</a>
  </nav>
  <h1>About</h1>
  <p>Thrasker development agency.</p>
</body>
But you don’t want to have to update all of your pages every time you add a link to your navigation, right?
This is where the components come into play and help you not to repeat yourself.
Astro Components
Astro components are the basic building blocks of any Astro project. They have two main parts:
- Component Script
- Component Template
Here is what an Astro component looks like:
---
// Component Script (JavaScript)
---
<!-- Component Template (HTML + JS Expressions) -->
Let’s add our first component to the project.
I’m going to create an src/components directory and add a header.astro file inside of it. Then, I'm moving my navigation markup into the Header component. For now, the script part of our component can stay empty.
---


---
<nav>
  <a href="/">Home</a>
  <a href="/about">About</a>
</nav>
The next step is to add the component to our pages. In order to do this, we need to import the component. So open your about.astro file and add the following import to the top of your file:
---
import Header from ‘../components/Header.astro’;
---
<html lang="en">
  <head>
    <meta charset="utf-8" />
    <link rel="icon" type="image/svg+xml" href="/favicon.svg" />
    <meta name="viewport" content="width=device-width" />
    <title>About</title>
  </head>
  <body>
    <h1>About</h1>
    <p>Thrasker development agency.</p>
  </body>
</html>
Now that the header component is imported, we can use it like this:
<body>
  <Header />
  <h1>About</h1>
</body>
Do the same thing for the home page which is your index.astro file in your pages directory.
Now if you check these pages in your browser, you should see your header being just fine.
Finally, I’ll add our logo and some semantic markup to our header along with a container so I can add some styles later:
<header>
  <div class="container">
    <a class="logo" href="/">
      <svg><!-- SVG Logo goes here --></svg></a>
    <nav>
      <a href="/">Home</a>
      <a href="/about">About</a>
    </nav>
  </div>
</header>
This is what’s so awesome about Astro. So far, we have made pages and added components to them without writing almost anything other than HTML.
Adding Script to Code Fences
Code fences are the script part of your Astro component. You can use a fence to write any JavaScript you need to render your template. You can even write TypeScript!
---
// The code fence area
---
For instance, in the previous section, I added an import line to my code fence to add the Header component to my page. We will get to what else we can do in a code fence as we continue in this post.
The reason it's called code fence is that whatever JavaScript code you write in it is “fenced in” and can’t escape into the browser and get to your user's hands. Everything you write here is just there to help your components template.
Let’s get back to our pages and add a variable to the code fences of the pages for storing the page title:
---
import Header from ‘../components/Header.astro’;
const pageTitle = ‘Bejamas’;
---
<html lang="en">
  <head>
    <title>{pageTitle}</title>
  </head>
  <body>
    <Header />
    <h1>{pageTitle}</h1>
  </body>
</html>
As you can see in the snippet above, you can define local JavaScript variables inside the code fence and then inject the variable into the HTML template using JSX-like expressions.
Now do the same thing in your other pages like about.astro, etc.
As you look at your different pages you might start to notice something annoying again. Yes, you repeat yourself when you write the same thing in different pages. All lines of code in your pages are exactly the same except the title.
I suppose it’s a good time to talk about layouts in Astro.
Templating with Astro Layouts
Astro layouts are just Astro components with different names that are used to create a UI structure or layout, such as a page template. Therefore anything that you can do inside a component is possible to achieve within a layout.
You can place your layout files anywhere in your project, but it's good practice to add them inside the src/layouts directory.
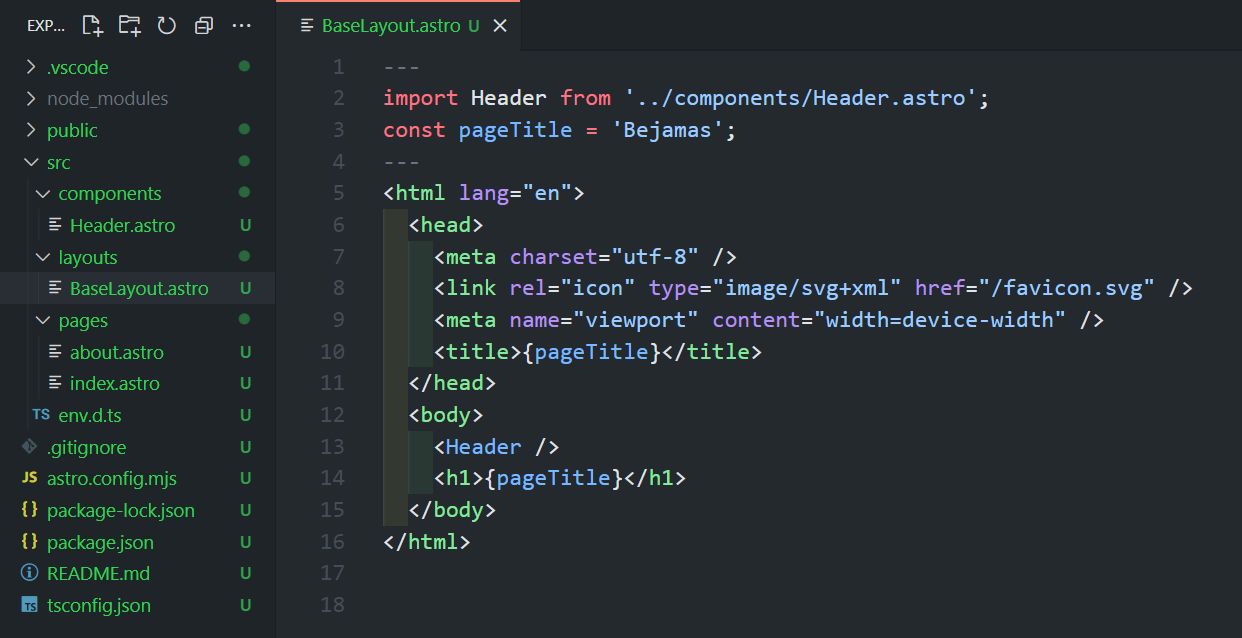
In our project, there was some shared markup across pages that could be used as a template to avoid repeating them in different files. To do that, let’s create a BaseLayout.astro file in the src/layouts directory.
We copy and paste the content of my index.astro inside this file:
You just made your first Astro layout and now you need to use it in your Astro pages. Let's see how you can do it.
Like components, the first step is to import the layout into the code fence, then use it by placing its tag in the template part. So here is what the astro.index will look like:
---
import BaseLayout from '../layouts/BaseLayout.astro';
---
<BaseLayout></BaseLayout>
If you try to do the same thing for your About page, you will notice that there is different content inside about.astro. You need to keep it or somehow pass it onto your BaseLayout file. This is where <slot /> comes in handy.
The Slot Element
The <slot /> element is a placeholder for external HTML content. It specifies where the child elements from other files should be injected into your component template.
You can add this element to your BaseLayout.astro file like the following code:
---
import Header from '../components/Header.astro';
const pageTitle = 'Bejamas';
---
<html lang="en">
  <head>
    <meta charset="utf-8" />
    <link rel="icon" type="image/svg+xml" href="/favicon.svg" />
    <meta name="viewport" content="width=device-width" />
    <title>{pageTitle}</title>
  </head>
  <body>
    <Header />
    <h1>{pageTitle}</h1>
    <slot /> <!-- your content is injected here -->
  </body>
</html>
Now, the content of the About page can go between the BaseLayout tag like this:
---
import BaseLayout from '../layouts/BaseLayout.astro';
---
<BaseLayout>
  <p>Thrasker development agency.</p>
</BaseLayout>
And if you check your browser, you’ll see how both pages work with the same template but different content.
There is only one part that we messed up, the title of the pages. In my example, both titles are “Bejamas”.
Here is where component props come to the rescue!
Astro Component Props
Apart from Slots, another feature of Astro components that can be very useful in layouts is Props. Any Astro component can define and receive props. By defining props apart from template parts, you make them available to scripting parts of your components through the Astro.props global.
In our example, we can define a pageTitle prop and pass it to our BaseLayout component to be able to have different page titles on different pages.
Here is how you can define a prop in the BaseLayout component:
---
import Header from '../components/Header.astro';
const { pageTitle } = Astro.props;
---
<html lang="en">
  <head>
    <title>{pageTitle}</title>
  </head>
  <body>
    <Header />
    <h1>{pageTitle}</h1>
    <slot /> <!-- your content is injected here -->
  </body>
</html>
Notice how we used destructuring syntax to pull out the props from the global Astro.props object. If you had more props you could use a coma like the line below:
const { pageTitle, pageDescription } = Astro.props;
Now let’s see how you can pass a prop to your component or layout.
The index.astro page can just pass the pageTitle prop as an attribute like this:
---
import BaseLayout from '../layouts/BaseLayout.astro';
---
<BaseLayout pageTitle="Bejamas"></BaseLayout>
Also, you could define a variable in your frontmatter script to be more organized. Let’s do that for our About page:
---
import BaseLayout from '../layouts/BaseLayout.astro';
const pageTitle = 'About';
---
<BaseLayout pageTitle={pageTitle}>
  <p>Thrasker development agency.</p>
</BaseLayout>
So far, I haven’t shown you any of the results. The reason has been the lack of styling, so let’s add some CSS.
Styling in Astro
Astro projects can be styled in a number of ways, which we can't cover here. You should know, however, that Astro supports any method you can think of. You can write plain CSS, Sass, and CSS Modules or even import your favorite CSS library like Tailwind.
You can add an <style> tag directly to your component or page template.
---


---
<style>
  .container { /*  */  }

  nav {
    display: flex;
    gap: 1rem;
  }


  nav a { /* */ }
</style>
<header>
  <div class="container">
    <a class="logo" href="/">
      <svg><!-- SVG Logo goes here --></svg></a>
    <nav>
      <a href="/">Home</a>
      <a href="/about">About</a>
    </nav>
  </div>
</header>
Astro <style> CSS rules are scoped and encapsulated inside the component by default. Meaning the styles that are written in this component don’t leak and won’t impact the rest of your site.
Apart from the Header component, I’ll add the rest of the styles to an external CSS file and import it as a global style in the project. We can talk more about styling in another post.
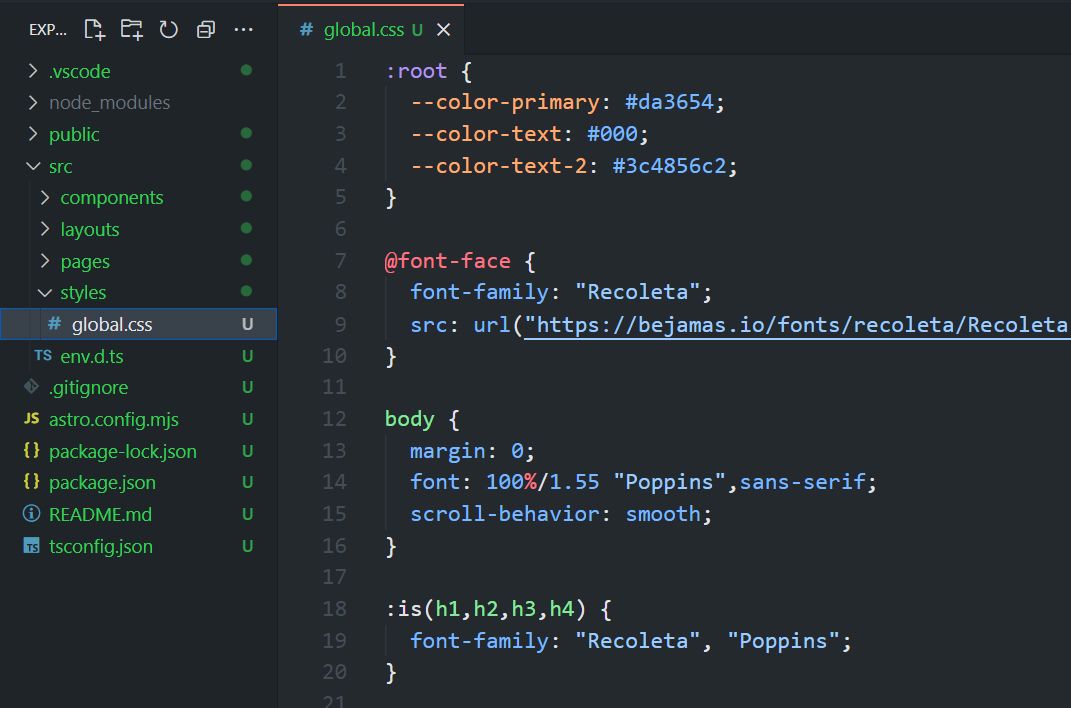
Here is how you can import your external CSS file into your BaseLayout.astro file:
---
import Header from '../components/Header.astro';
import '../styles/global.css';
const { pageTitle } = Astro.props;
---
<html lang="en">
  <head>
    <title>{pageTitle}</title>
  </head>
  <body>
    <Header />
    <h1>{pageTitle}</h1>
    <slot />
  </body>
</html>
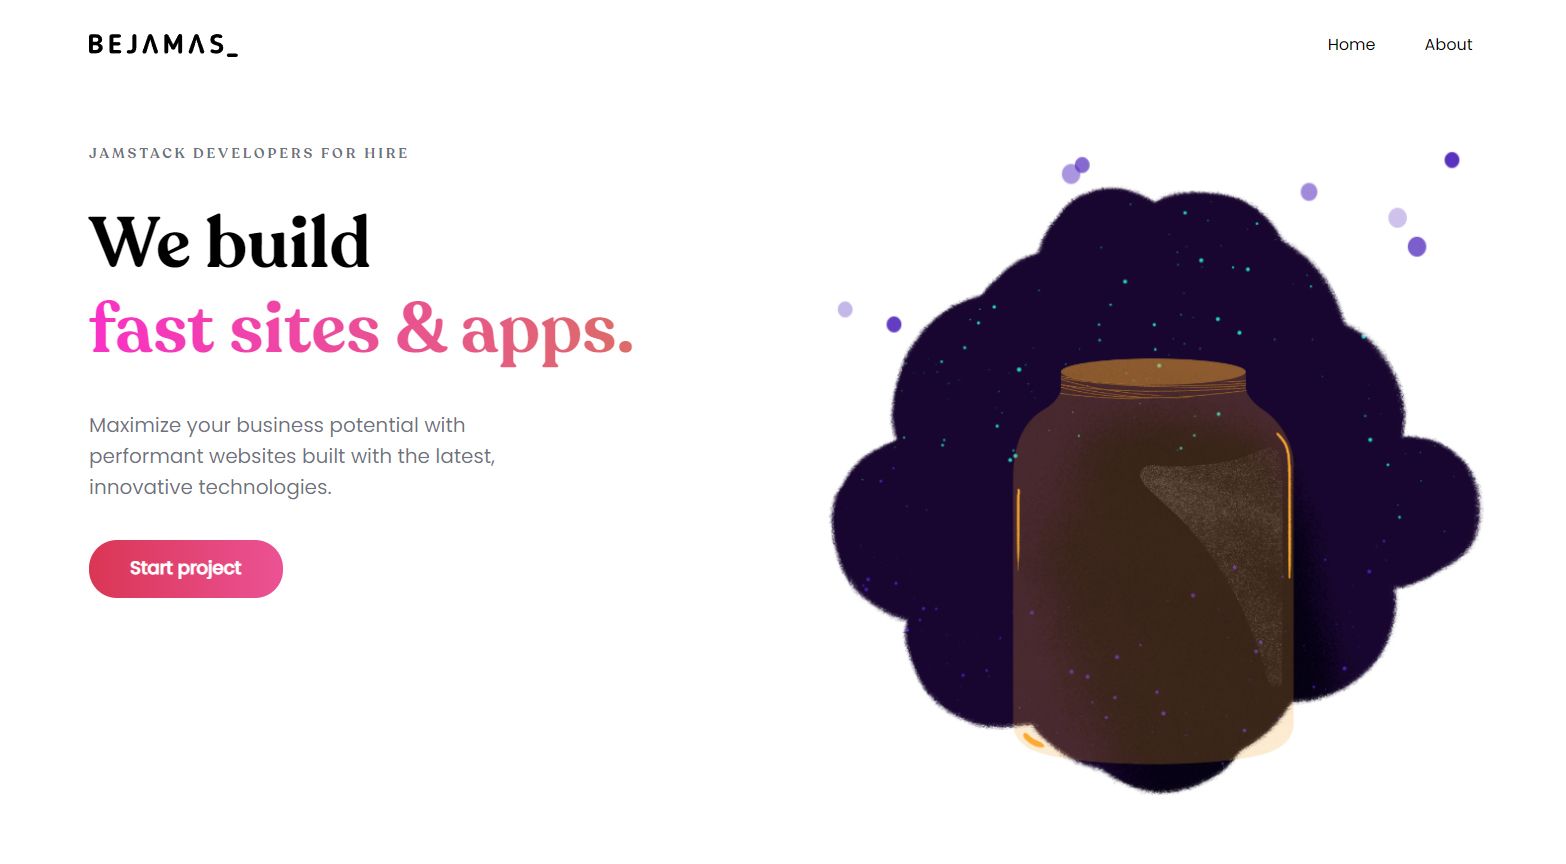
Before I jump to the next section, I’m going to share a working demo here. I added some static content to my Home and About pages and wrote some styles.
Here is what I added to my home page:
---
import BaseLayout from '../layouts/BaseLayout.astro';
const pageTitle = 'Bejamas';
---
<BaseLayout pageTitle={pageTitle}>
<section class="section">
<div class="container">
<div class="banner">
<div class="">
<h3 class="pretitle">Thrasker Developers for hire</h3>
<h1 class="title">We build<br><mark>fast sites & apps.</mark></h1>
<p class="text">Maximize your business potential...</p>
<a class="button" href="">Start project</a>
</div>
<img src="jam.svg" alt="" />
</div>
</div>
</section>
</BaseLayout>
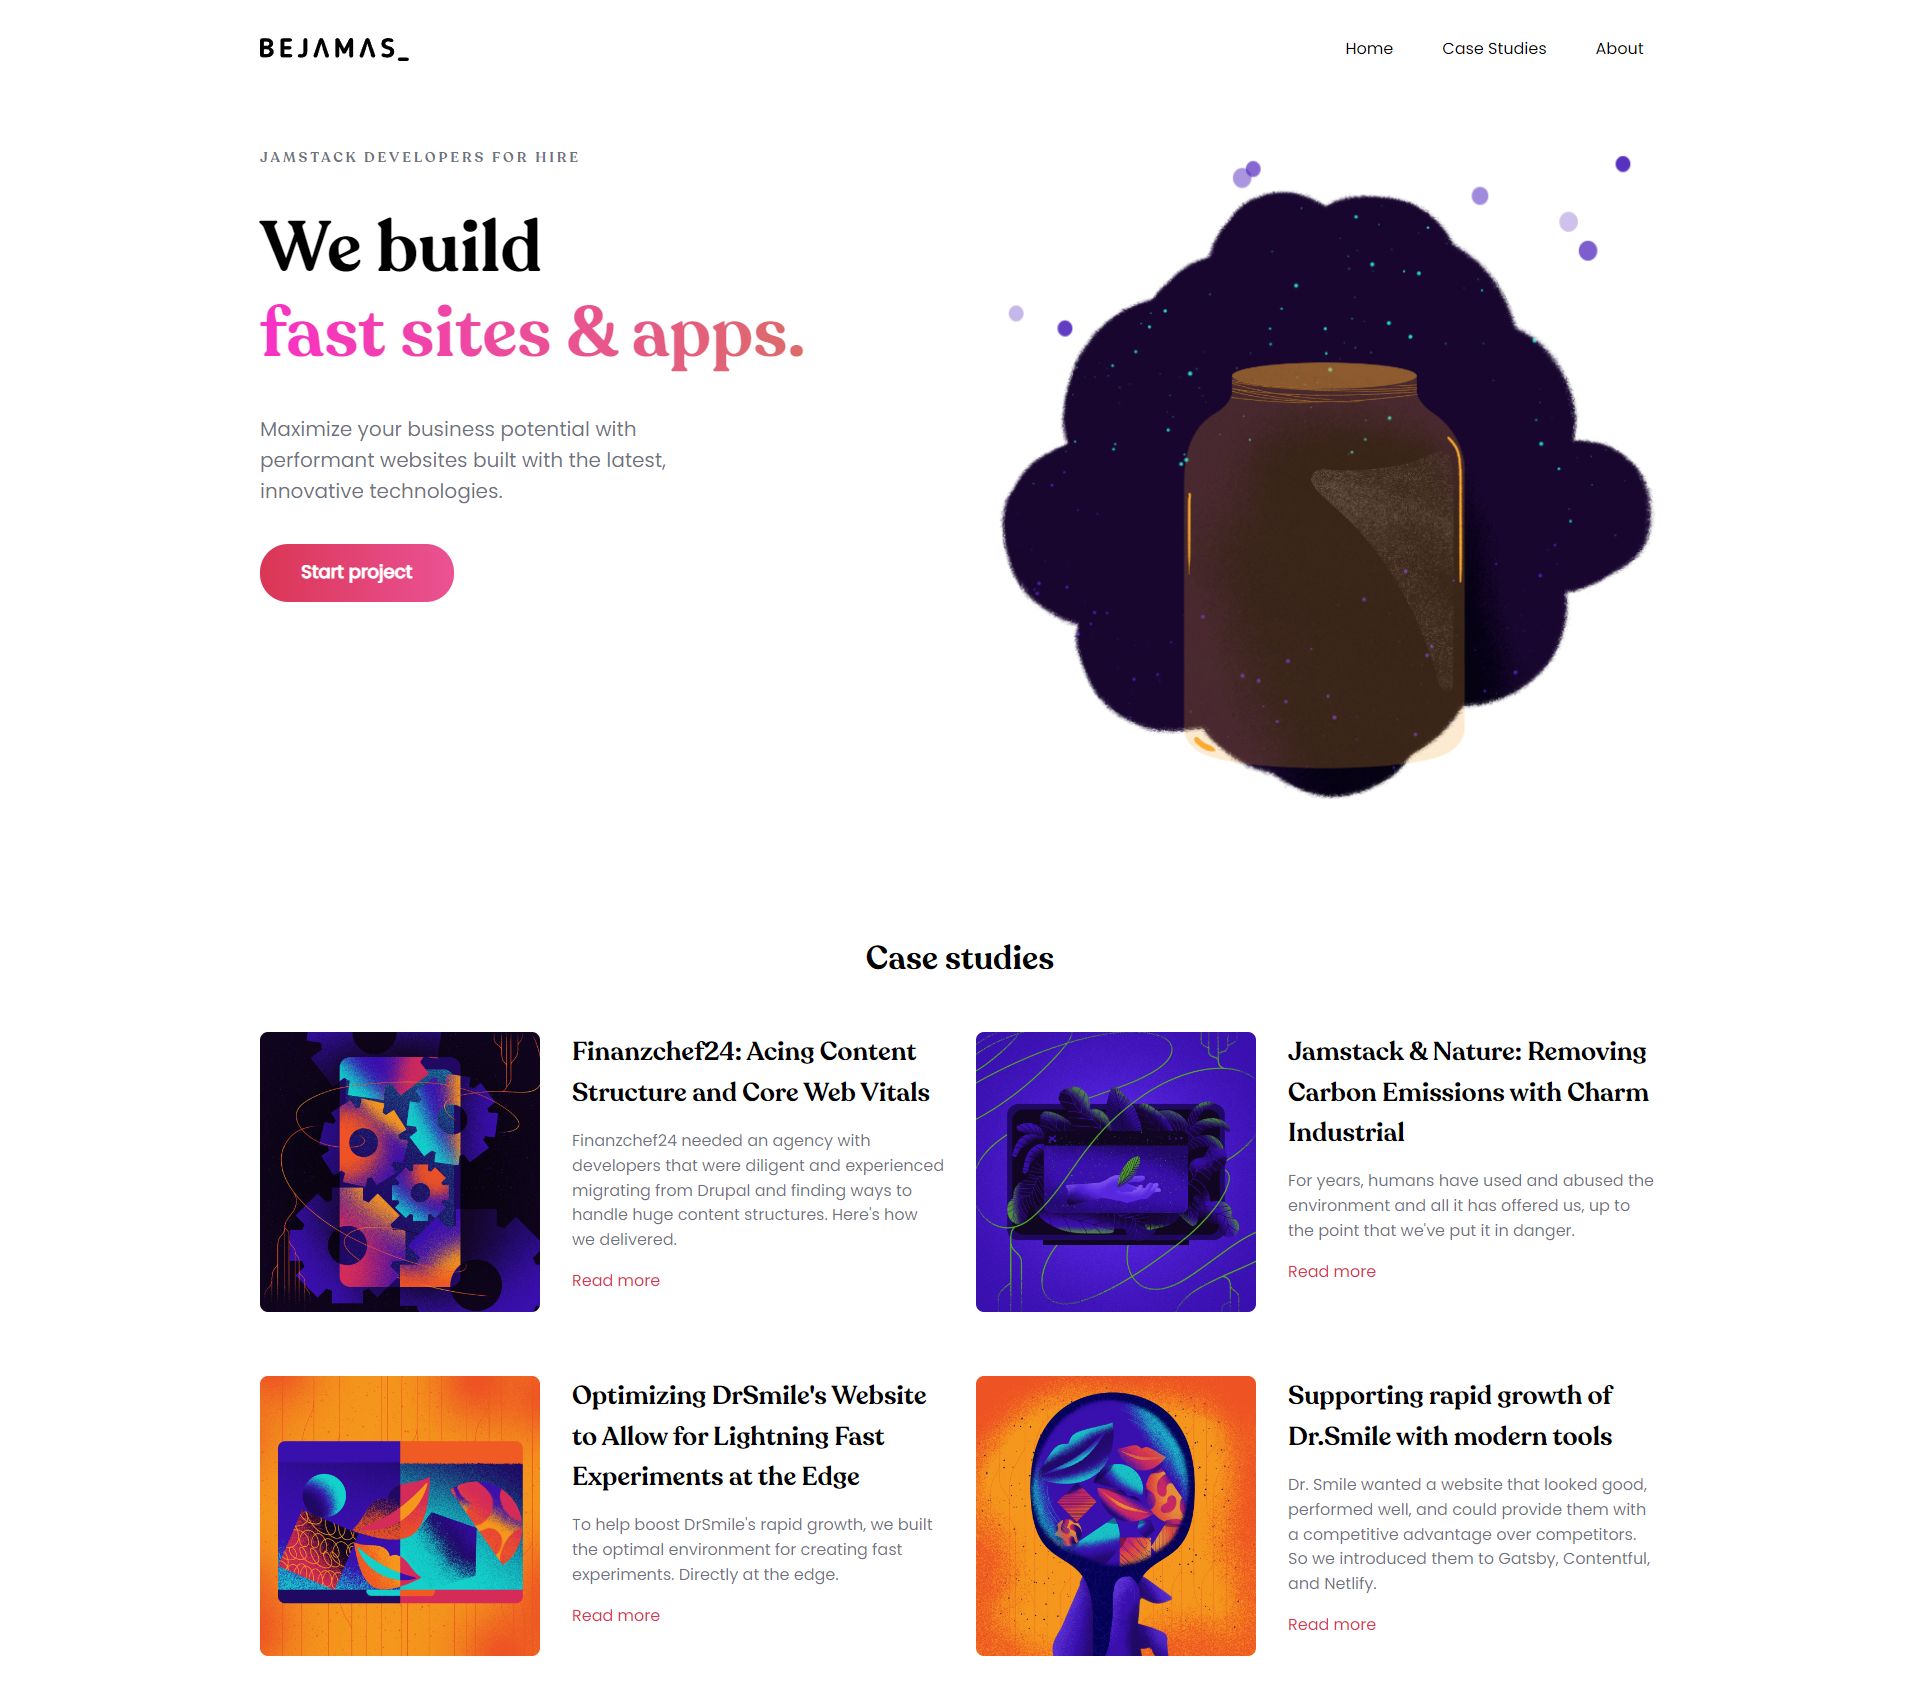
Here is how my homepage looks like:
Fetching Data in Astro
If you look at the design of what we are building here, you’ll notice a case study section below the header. In this part of our tutorial, we are going to use Bejamas API to fetch some data from the server and create those case study cards on our homepage.
Fetching data in Astro is super easy. You can use the global fetch() function in your code fences to make HTTP requests to APIs in all your components.
In index.astro, I’m going to add this code to fetch the case studies data from the server using the fetch() function:
---
  import BaseLayout from '../layouts/BaseLayout.astro';
  const pageTitle = 'Bejamas';
  const response = await fetch('bejamas.io/api/blog?category=case-studies');
  const data = await response.json();
  const posts = data.posts;
---
Now that I have the data available in the posts variable, I can use it to generate dynamic HTML to show the case study cards on my home page.
Here is what the posts array looks like:
"posts": [
  {
    "excerpt": "",
    "mainImage": {
      "asset": {
        "url": ""
      }
    },
    "slug": "",
    "title": ""
  }
]
I’ll use the map function to loop through the posts and create each card dynamically like this:
<section class="section" id="casestudies-section">
  <div class="container">
    <h2 class="section-title">Case studies</h2>
    <ul class="case-studies">
      {posts.map((post) => (
        <li>
          <article class="casestudy">
            <img src={post.mainImage.asset.url} alt="" />
            <div>
              <h3>{post.title}</h3>
              <p>{post.excerpt}</p>
              <a href={`https://bejamas.io/blog/${post.slug}`} class="">Read more</a>
            </div>
          </article>
        </li>
      ))}
    </ul>
  </div>
</section>
The coolest thing here is that all of this is happening at build time, and we will only send static HTML to the browser.
This is the result after adding style to the global CSS:
Nesting layouts
Did you notice that, again, we had to add the <head> and <body> tags to our BlogLayout.astro layout? Can’t we just use our BaseLayout for this?
Since Astor layouts are basically components, we can nest them. So all we need to do is add our BaseLayout to the new BlogLayout.astro file:
---
import BaseLayout from "./BaseLayout.astro";
const { frontmatter } = Astro.props;
---


<BaseLayout pageTitle={frontmatter.title}>
  <div class="container">
    <div class="meta">
      <div>
        <time class="date">{frontmatter.pubDate.slice(0, 10)}</time>
        <h1 class="title">{frontmatter.title}</h1>
        <p class="description">{frontmatter.description}</p>
        <span class="author">Author: <span class="author-name">{frontmatter.author}</span></span>
      </div>
      <img class="poster" src={frontmatter.image.url}  alt={frontmatter.image.alt} />
    </div>
    <div class="body">
      <slot />
    </div>
  </div>
</BaseLayout>
How neat, isn't it?
Also, notice how we passed the title of our page to be the page title in our BaseLayout:
<BaseLayout pageTitle={frontmatter.title}>
Let’s add some styles to the BlogLayout to make it look more like our post at Bejamas.io. I’m going to add scoped styles to the BlogLayout.astro file:
---
import BaseLayout from "./BaseLayout.astro";
const { frontmatter } = Astro.props;
---


<style>
  .container {
    padding: 3rem 0;
    max-width: 1152px;
  }


  .meta {
    display: flex;
    align-items: center;
    justify-content: space-between;
    gap: 2rem;
  }


  /* And more... */
</style>


<BaseLayout pageTitle={frontmatter.title}>
  <!-- ... -->
</BaseLayout>
Adding Scripts in Astro
You can add interactivity to your Astro components using standard HTML <script> tags. This allows you to send JavaScript to run in the browser and add functionality to your Astro components. For instance, for a toggle to switch the light mode to dark, you don’t need a JavaScript framework, and you can handle it using plain JavaScript.
In .astro files, you can add client-side JavaScript in the same standard ways you can do in an HTML file:
<script>
  console.log('Print this to the browser console');
</script>


<!-- relative path to script at `src/scripts/local.js` -->
<script src="../scripts/local.js"></script>


<!-- also works for local TypeScript files -->
<script src="./script-with-types.ts"></script>


<script is:inline src="https://my-extenrnal-script.com/script.js"></script>
All the scripts you add will be processed and bundled in Astro and then injected into your page’s page’s <head> with type="module".
If you want to avoid bundling the script, you can use the is:inline directive as you see in the last example below that imports an external file.